Webinars (Catalog)
In this article
Webinars are virtual products that fall under the Videos parent category. It allows users to purchase a video product with different expiry options such as 30 days or 90 days and in the users' account, they can access the video using the Link Source/URL set in one of the product's information fields. You can also use the Catalog to add regular products such as t-shirts and hats, or virtual products such as sponsorship packages to be sold on your website. You can watch our training video on this section here.
Access Rights required: Site Administrator or Catalog Manager.
You must have the Catalog plugin available on your website, if it is not available, please open a ticket with us and we will add it for you.
To publish a Webinar, you need at least one Catalog Options with an "x days" value (more information below on this topic).
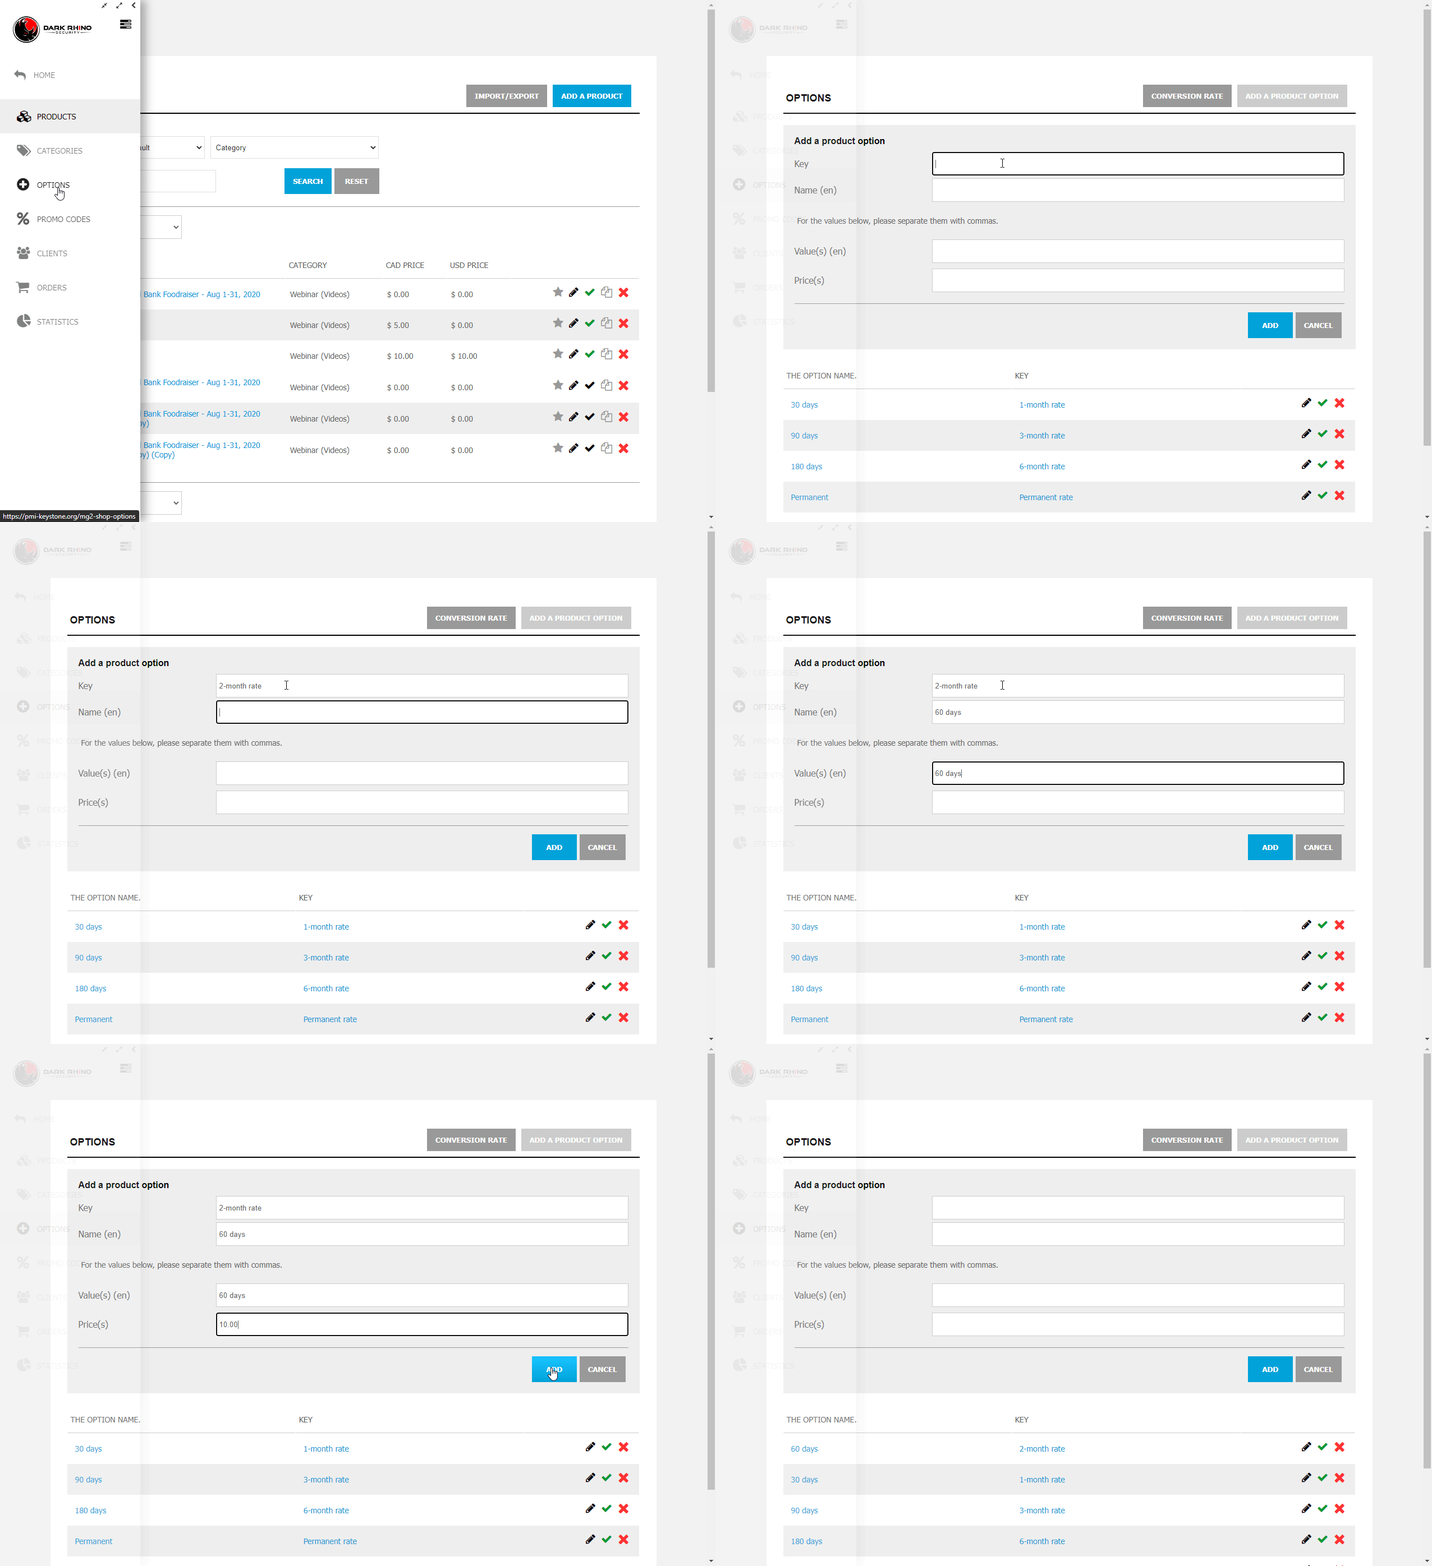
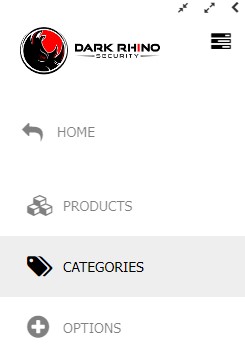
Click on the DRS logo and choose "Catalog" from the menu and then choose "Options".
Add an Option
Click on the button 
Fill in all the fields of the Add a product option form.
|
Field Name |
Description |
Sample Value |
|
Key |
Name of the option displayed in the Product form where only admins can see it. It can be the same as Name. |
15-day rate |
|
Name |
Name of the option displayed for the users as a webinar choice. |
15 days |
|
Value(s) |
Expiry duration for a purchased product. The value musts be "# days". After this number of days following the purchase, the product will expire and the user will no longer have access to it. |
15 days |
|
Price(s) |
Additional price of the option with the Product's price. You can leave it at 0, or you can set different prices for the different number of days. |
12.5 |

Edit an Option
In the option list, click on the Modify icon .
.
Change the desired values in the Option fields

Click  to save the changes or
  to cancel the modification.
Enable/Disable an Option
Click on the Check icon ![]() to enable or disable the option.
to enable or disable the option.
Disabled Options will be removed from the Product options list and the user's webinar choices.
Delete an Option
Click on the Delete icon  .
.
A prompt window pops up to confirm the deletion.
Click on the DRS logo and choose "Catalog" from the menu.
Create a Webinar
Click on the button  .
.
Enter the required information in the Product fields.
|
Field Name |
Description |
Sample Value |
|
Name |
Webinar's name. |
PMI Virtual Event |
|
Additional Info |
(Optional) Short description about the Webinar. |
|
|
Category |
Category of the Product. It musts be under the main (Videos) category to be a Webinar product. |
Webinar (Videos) |
|
Image |
(Optional) A preview image of the video. Click BROWSE to upload a new picture from your computer. |
|
|
Gallery |
Not applicable. |
|
|
Description |
Full details of the Webinar. |
|
|
Options |
Webinar's expiry options. A user has to select one of the checked options in order to add a webinar to cart. |
1-month rate, 3-month rate, Permanent rate |
|
Price and Inventory |
Base pricings for non-members and members. If there is a field with (USD) label, set the same price as the field above it. Note: if the fields say "Leave this uncheck" or "empty", they must be left empty. |
Non-member price: 5 Member price: 0 |
|
Video published year |
(Optional) A year tag for better search when there are many webinars. |
2023 |
|
Linked events IDs |
(Optional) IDs of the events associated with this Product. The webinar will be displayed at the bottom on the details page of the events. |
1234,1235 |
|
Video link source |
A link/path/URL to the video. Supports: - Uploaded video (works best with MP4) in the File List; - Wistia, Vimeo or YouTube embeded link; |
https://pmichapter.org/static/uploaded/Files/video/Webinar-Jan-20.mp4 |
|
Other products |
Not applicable. |
Finally, click on the SAVE button.
Edit a Webinar
Click the Edit button  to open the Product edit form.
Enable/Disable a Webinar
Click on this icon ![]() to immediately enable or disable a Product from being displayed in the Shop/Webinars page.
to immediately enable or disable a Product from being displayed in the Shop/Webinars page.
Duplicate a Webinar
Click the Clone button  to duplicate a Product.
Duplicated products will contain the same information and its name will have "(Copy)" appended at the end.
Delete a Webinar
Click the Delete button  to delete a Product.
A prompt window pops up to confirm the deletion.
Make a Webinar Featured
Click the Star button  to mark the Product as Featured.
Featured products are listed at the top (before any other products).
Click on the DRS logo and choose "Catalog" from the menu and then select "Categories".

Caution! Removing a 1st level category will remove all of its children (2nd level) categories and all of the products associated with this category.
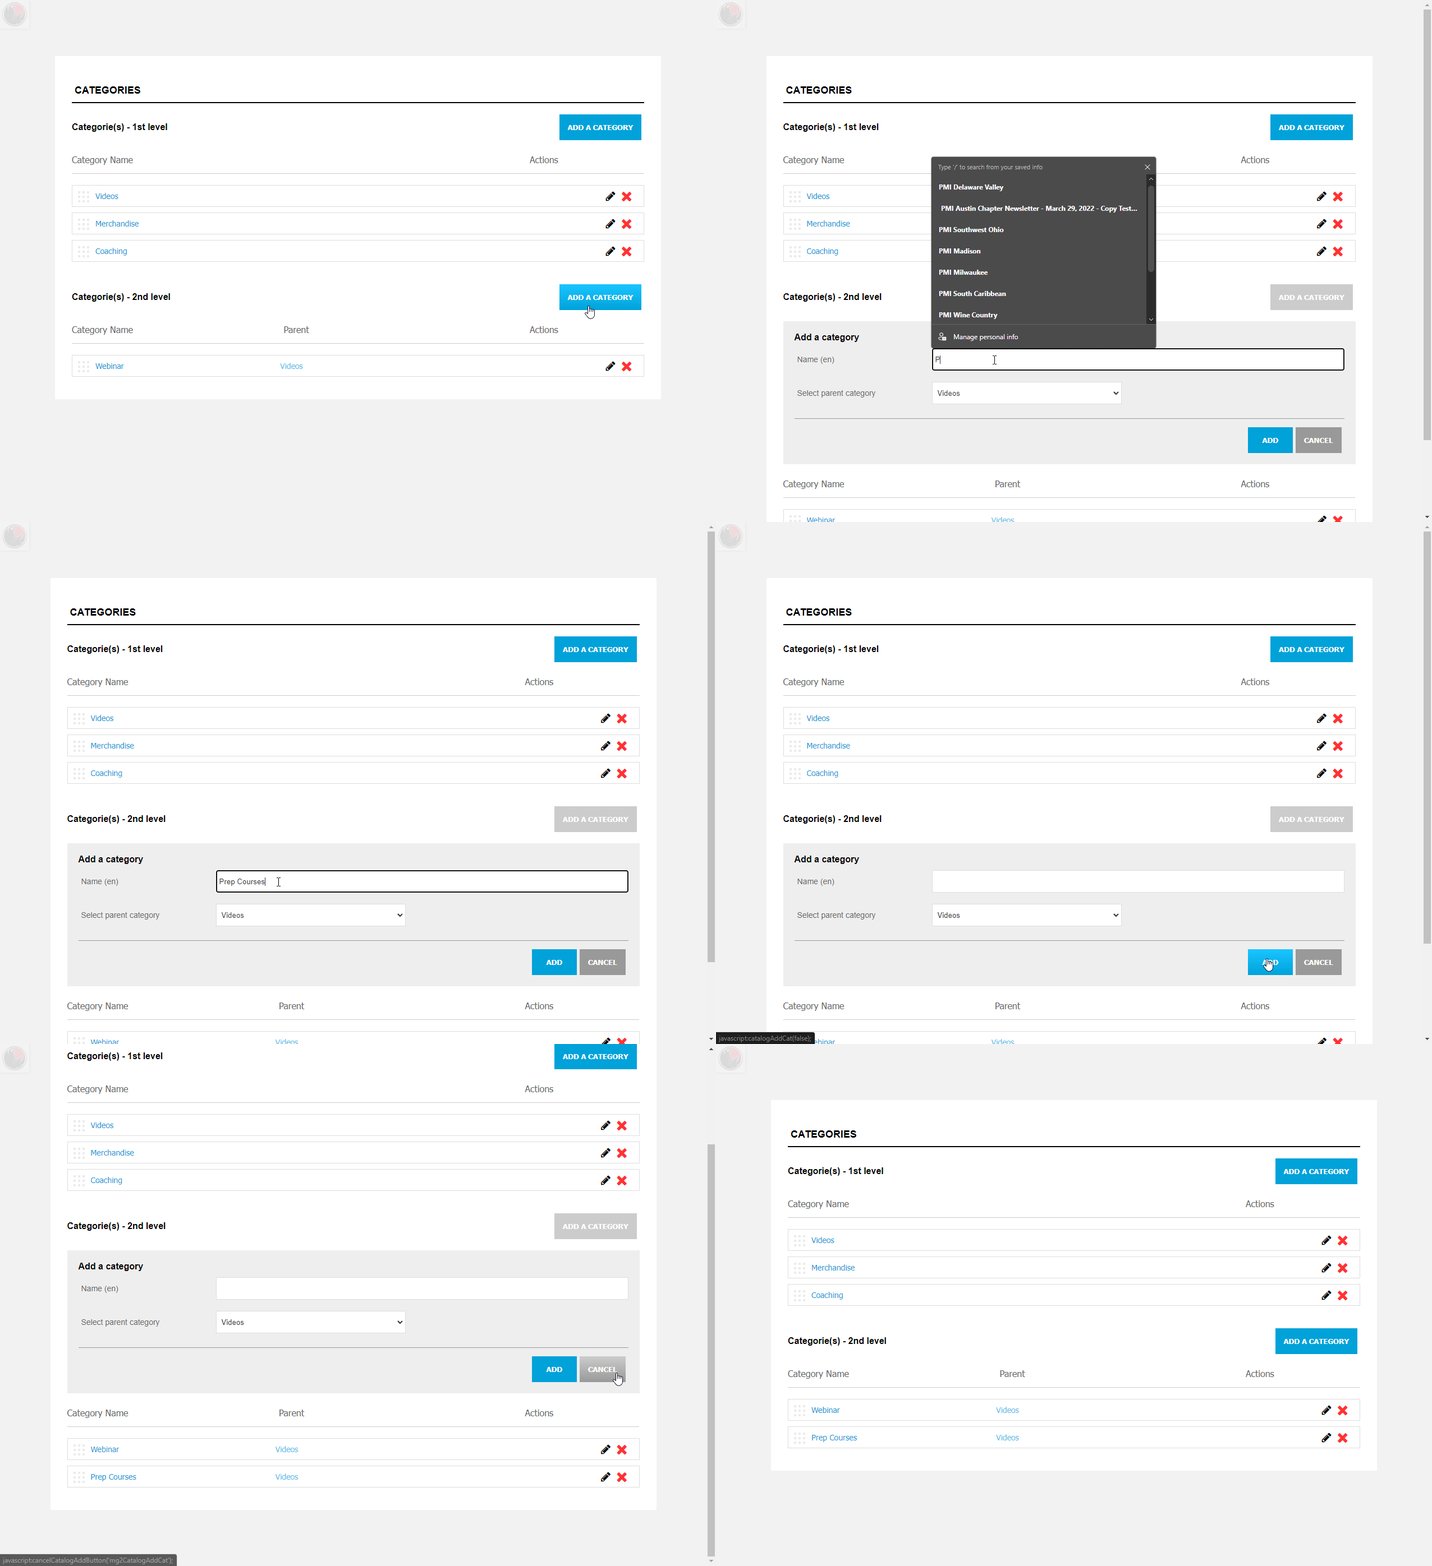
Create a Category
At the Categorie(s) - 2nd level, click the button  .
.
Fill in the category Name. If the category is for Webinars then leave the Select parent category field as Videos.

Edit a Category
In the option list, click on the Modify icon .
.
Change the desired values in the Category fields.
Click  to save the changes or
  to cancel the modification.
Delete a Category
Click on the Delete icon  .
.
A prompt window pops up to confirm the deletion.
Caution! Removing a 2nd level category will remove all of its assigned products.


