Newsletter Management
In this article
- Create a mailing list
- Create a Template
- Launch a Campain
- Upload a document to a newsletter
- Send a campaign to an event's registrant list
- Reminders
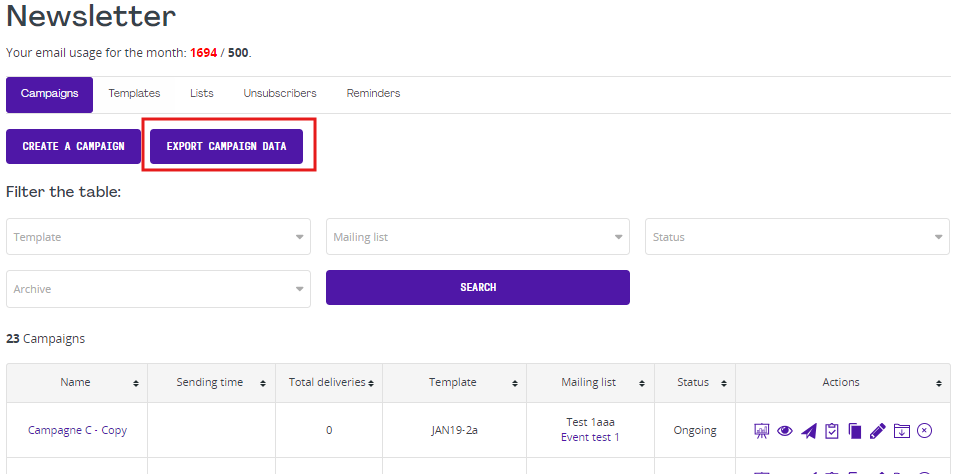
- Export Campaign Data
The newsletter allows you to send email communications. You can import lists or use some of the automated lists created for you. You can also setup automated messages like a welcoming email for new members. This article will go through these features with you and you can also view the training videos for the Manage Newsletter section here.
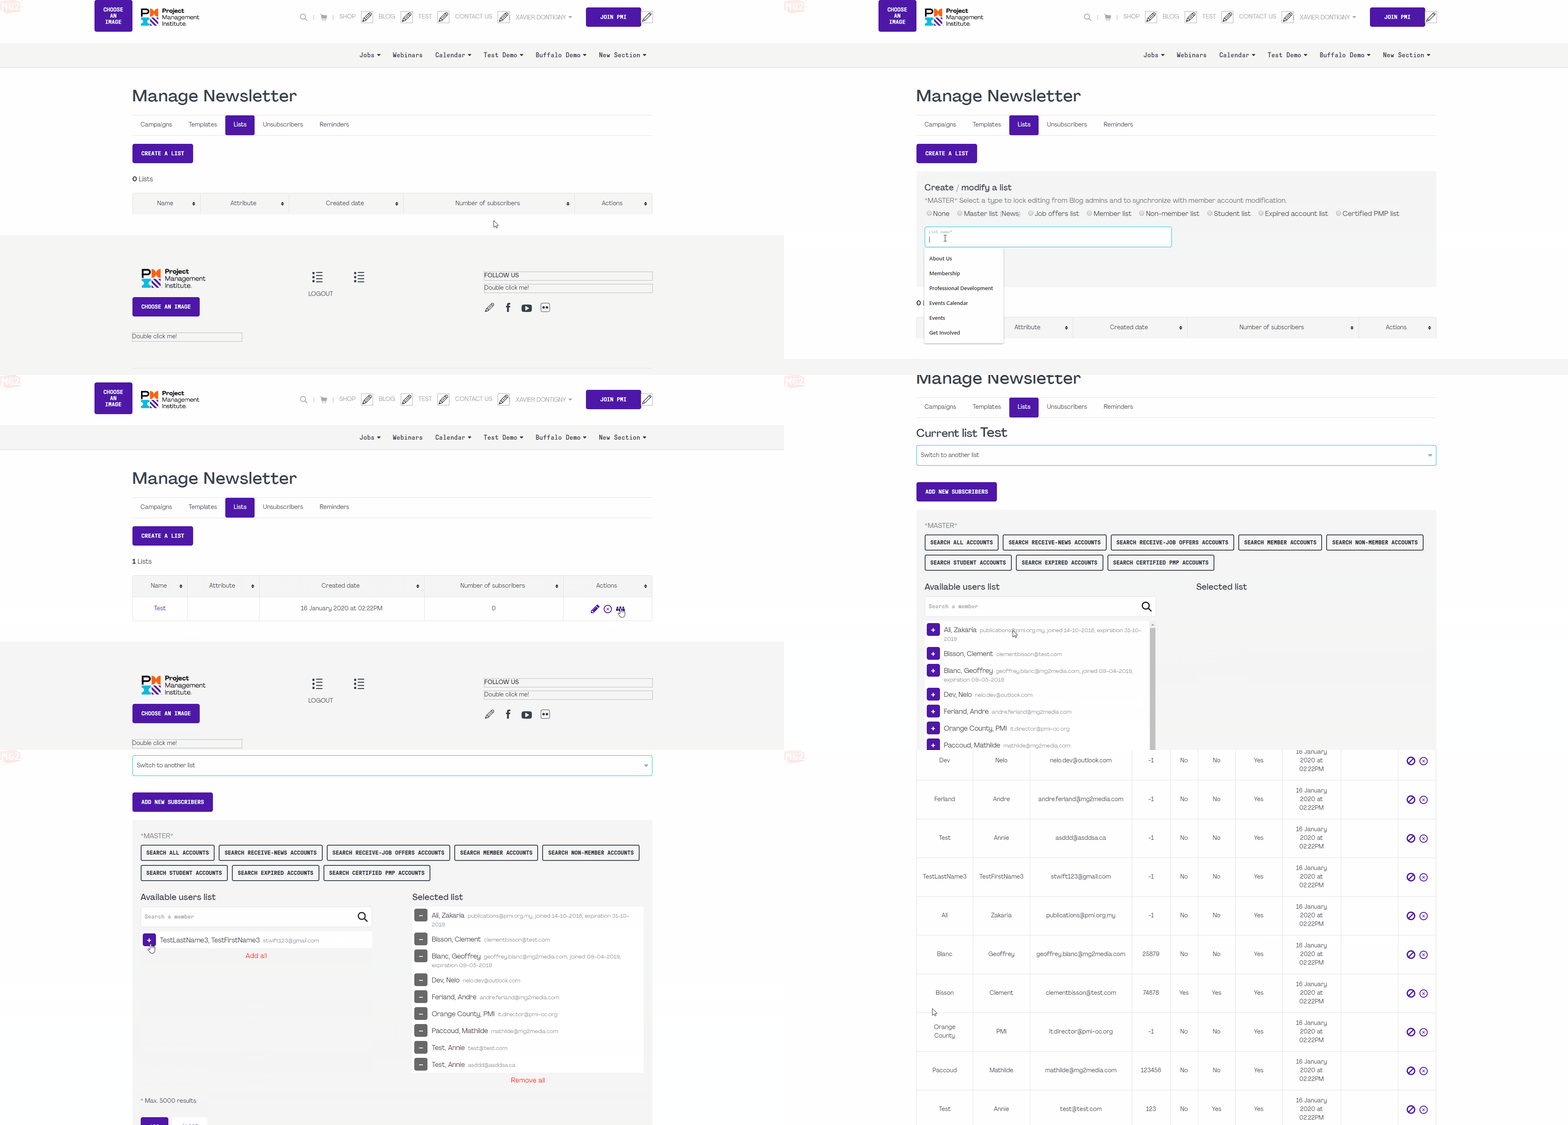
To create a mailing list:
- Create a new list and name it.
- Click on this icon:

- Add subscribers to your list.
To create a new template:
- Click on create a new template.
- Name your template.
- Modify its content.
- Save your template.
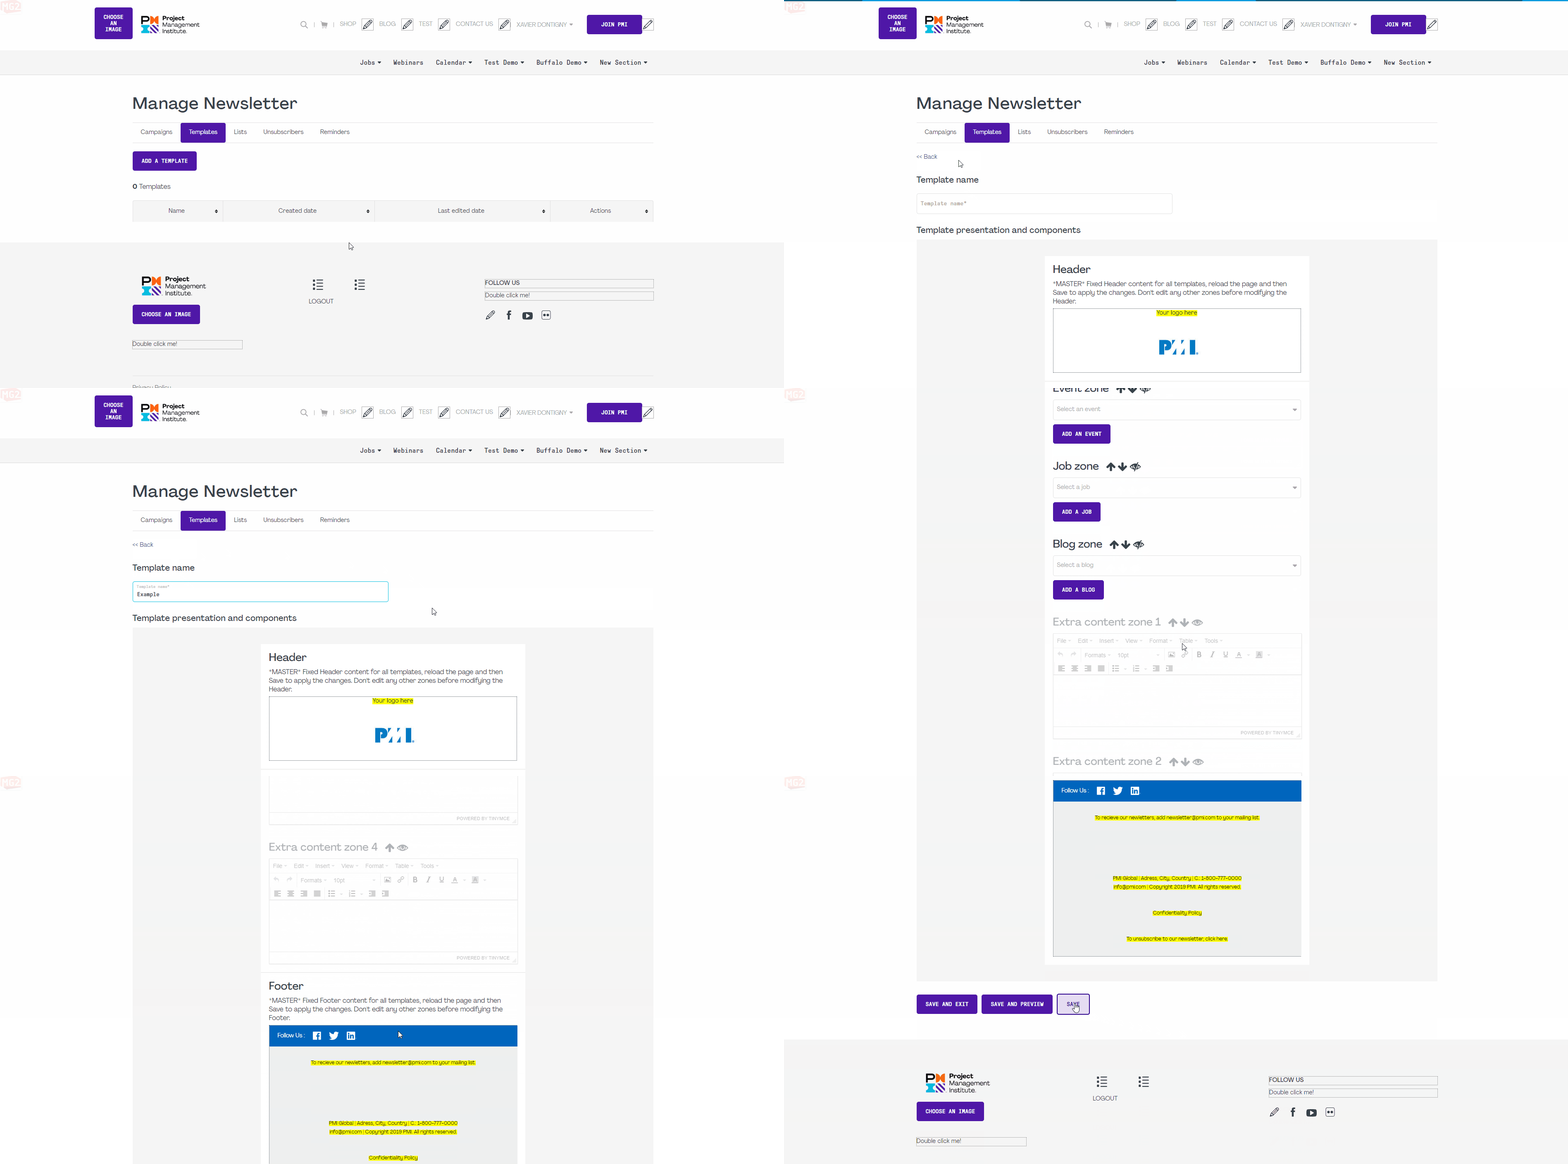
You can also preview your template by clicking on save and preview.
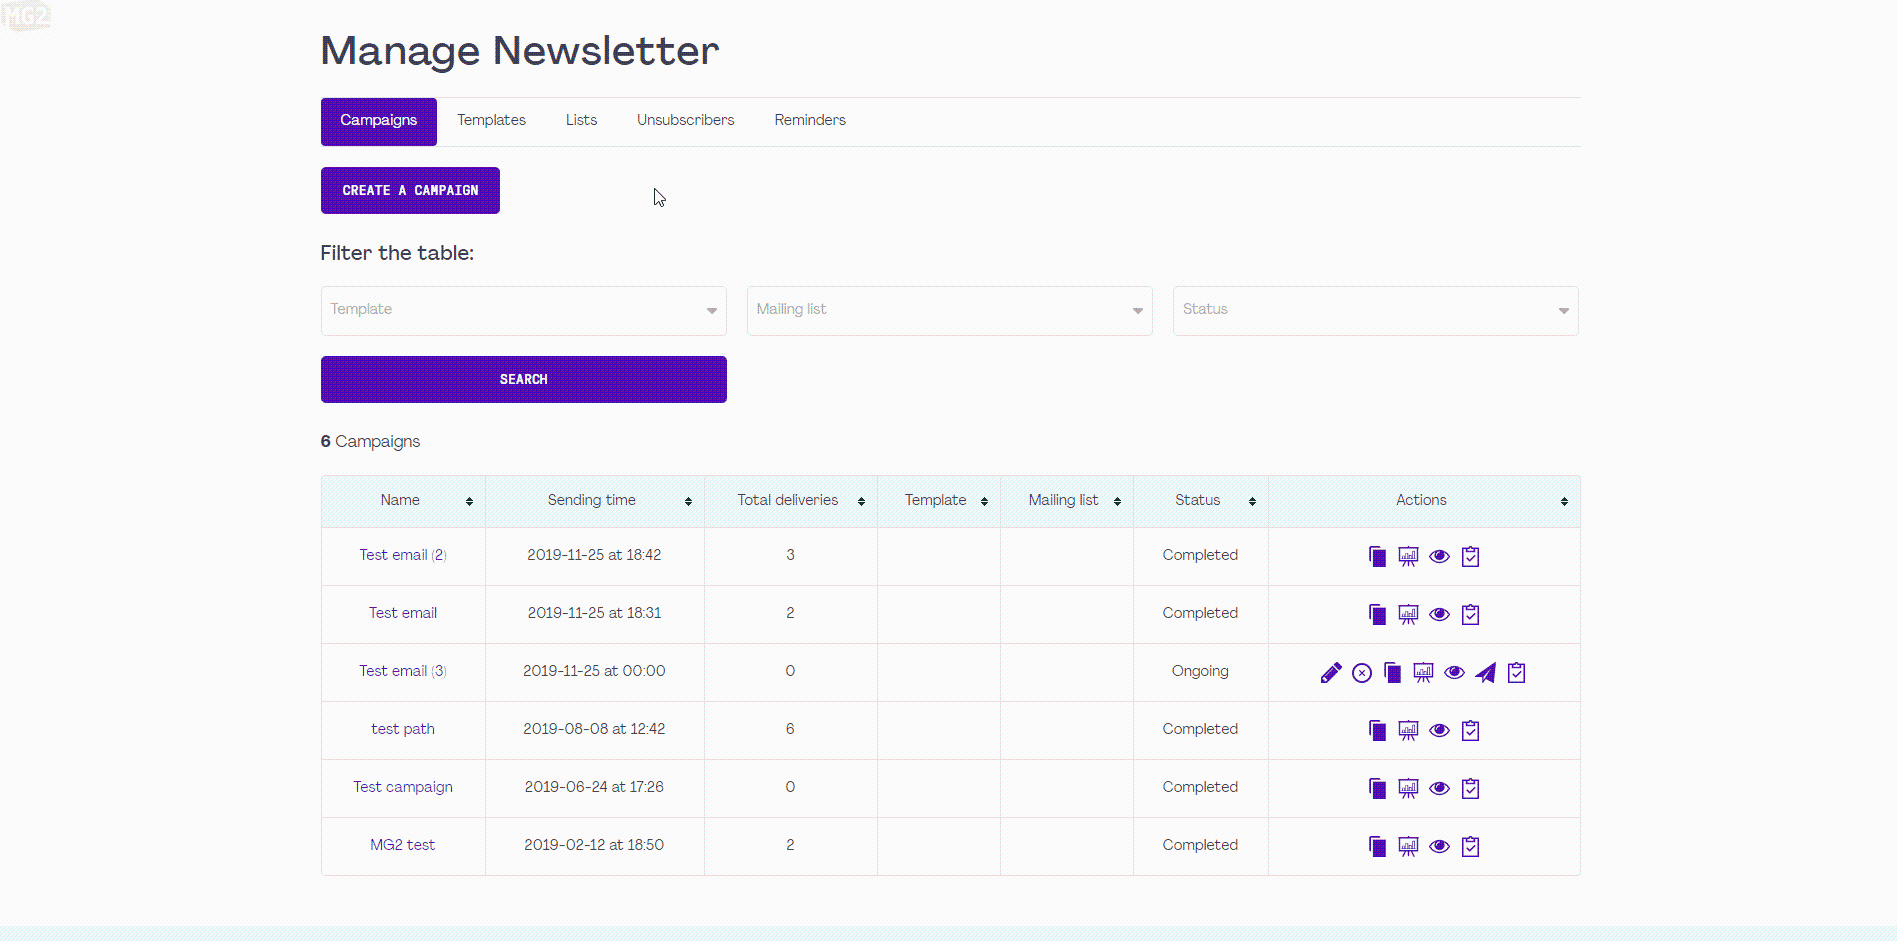
Launch your campain and fill the required fields:
Reminders allow you to send automatic emails depending on a specific trigger.
There are multiple types of triggers available and you can view them by clicking on the "Reminder Type" select option.
As a newsletter administrator, you can go to the "Manage Newsletter" section and click on the "Reminders" tab.
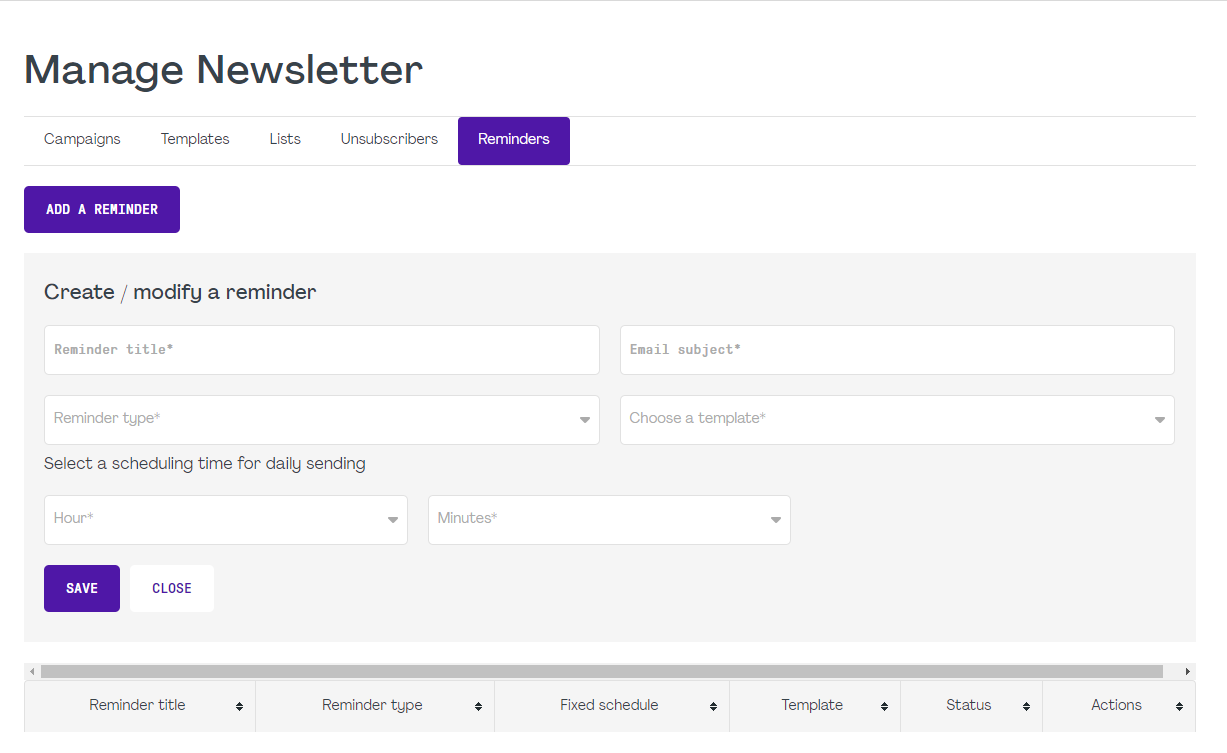
When you create a reminder, simply fill all the inputs :
- Reminder title : This is for internal record keeping only. This is not communicated to your clients.
- Email subject :Tthe subject of the email sent to your clients.
- Reminder Type : The trigger that you wish to use for this reminder.
- Choose a template : You can select a template created from the Templates tab. This is the email template that will be sent to the clients.
- Hour & Minutes : Reminders are being sent daily. You can specify the time when you want the reminder to be sent.
Once you have created your reminder, our system takes over and sends the reminders daily with your predefined settings.
The automated trigger will only send emails to those who meet the conditions moving forward from this date and will not retroactively send emails.

