Admin Menu
In this article
- Create an Administrative User
- Modify an Administrative User's Password
- Delete a User Profile
- Log Entries
- Redirections
- Promote a member account to be an administrative user
This section of the user's guide focuses on the Admin menu. In order to see this menu, you must have the Site Administrator role which is the highest possible role in the DRS platform. There is also a training video available for this section here.
- To add a user to the site, click on the DRS logo and choose "Admin" from the menu.
- A drop-down menu will appear and click on "Create User".
- A window will appear. Fill the fields in order to create the user:
- Username: Set the username for this user.
- Password: Set the password for this user.
- First name: Set the first name for this user.
- Last Name: Set the lsat name for this user.
- Email: Set the email address or this user.
4. Click on "Create".
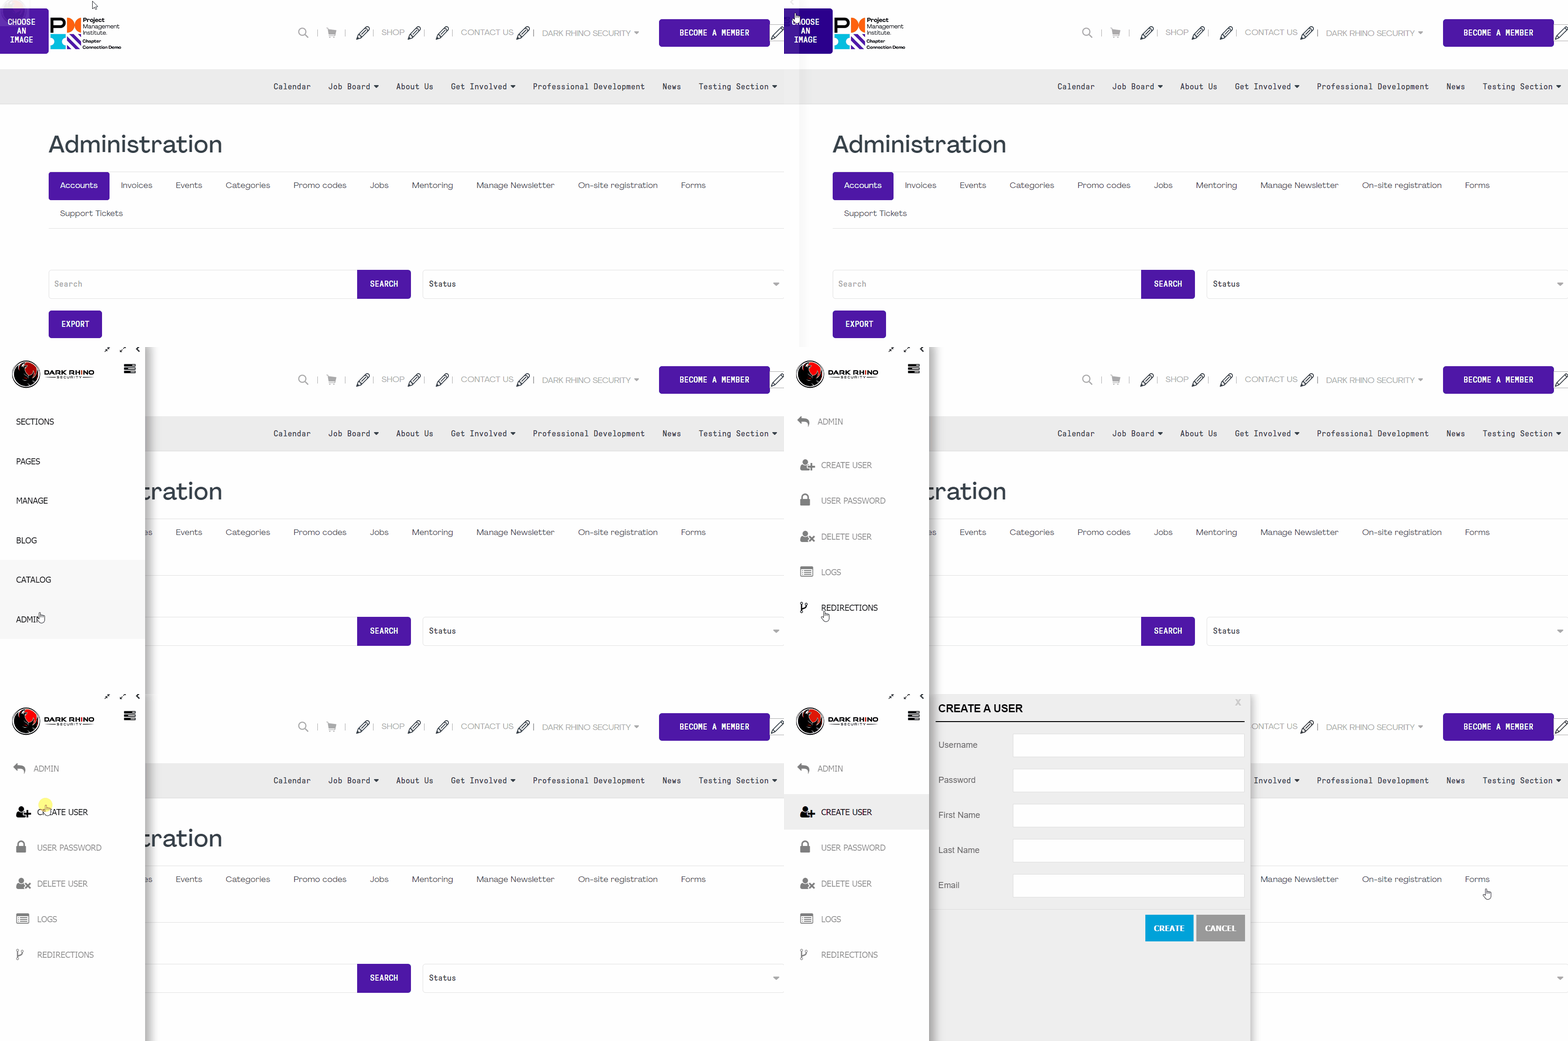
The username and password fields are case-sensitive (meaning that they take into account upper and lower case letters).
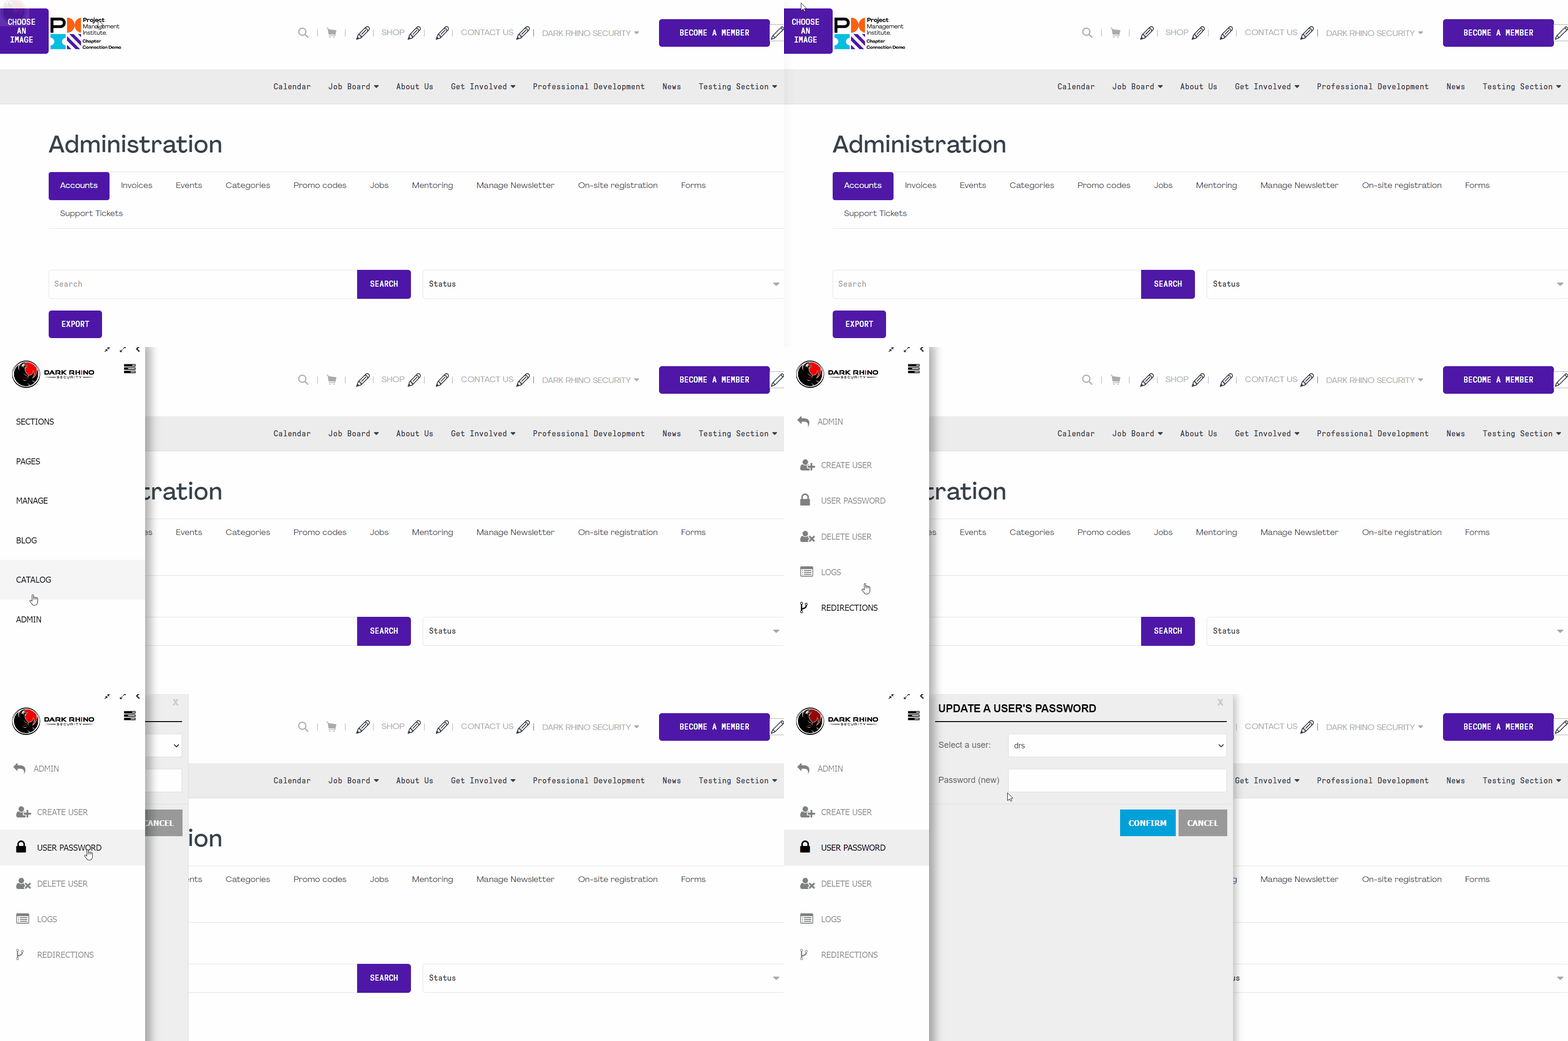
- To modify an administrative user's password, click on the DRS logo and choose "Admin" from the menu.
- A drop-down menu will appear and click on "User Password".
- A window will appear. You must choose the user from "Select a User" and then set the user's new password.
- 4. Click on "Confirm" to save the changes.
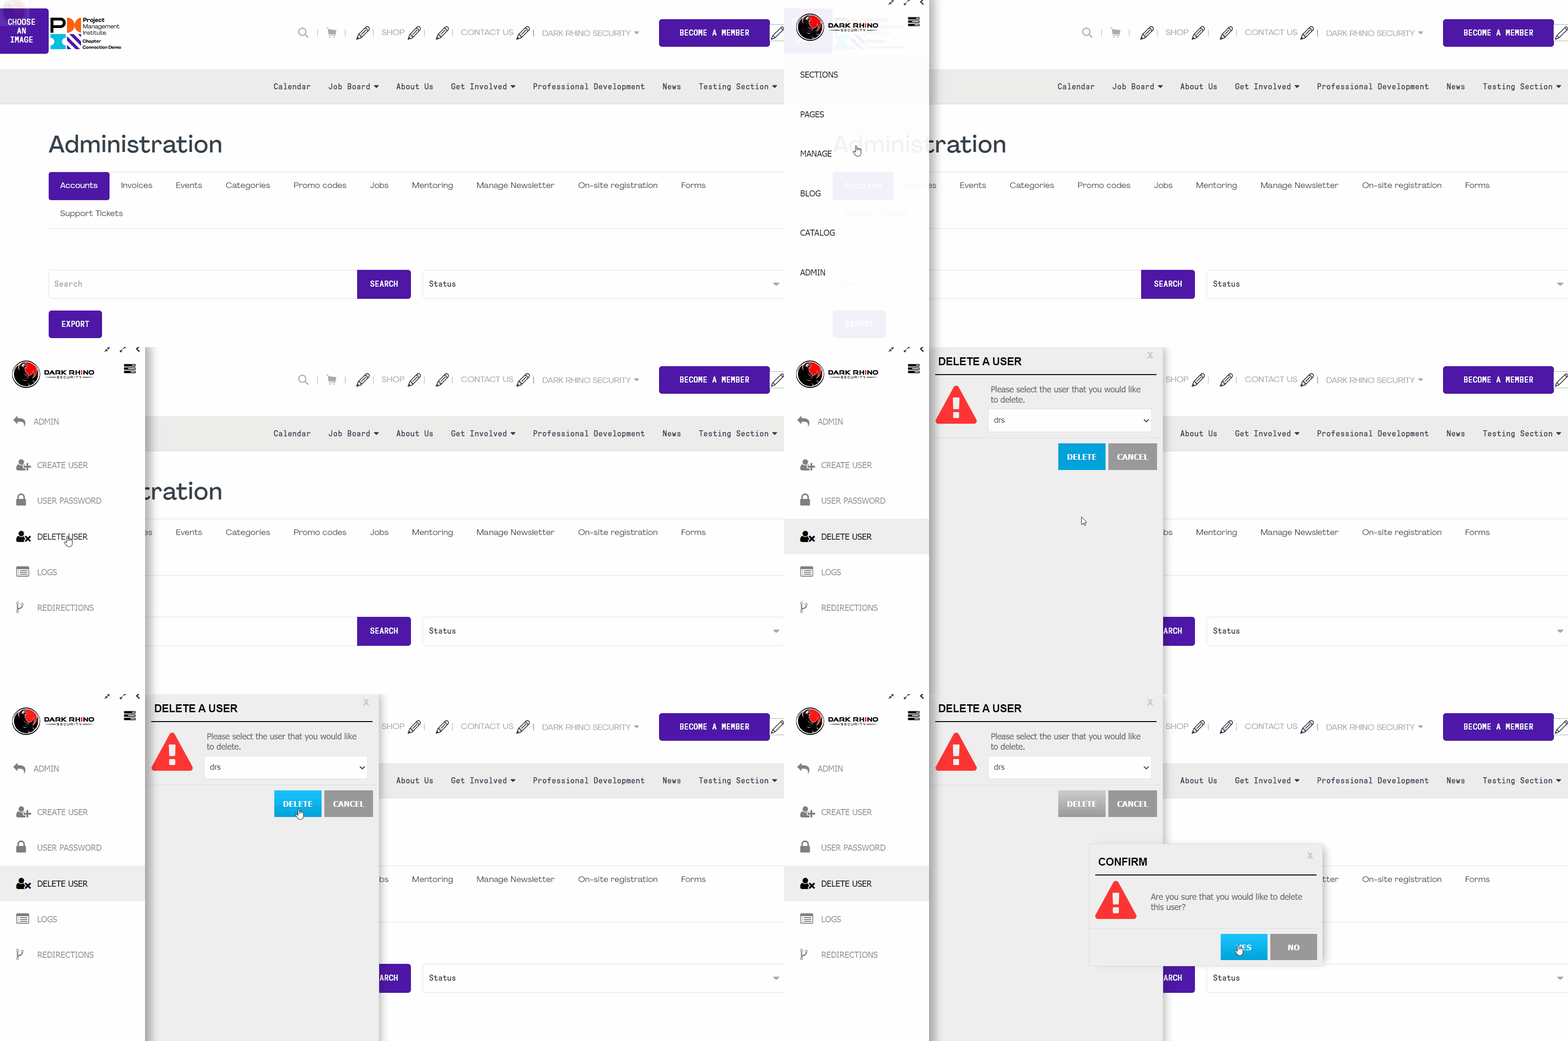
- To delete an administrative user from the site, you must click on the DRS logo and choose "Admin" from the menu.
- A drop-down menu will appear and click on "Delete a user".
- A window will appear:
- Select the user you want to delete;
- Click on "Delete" to confirm.
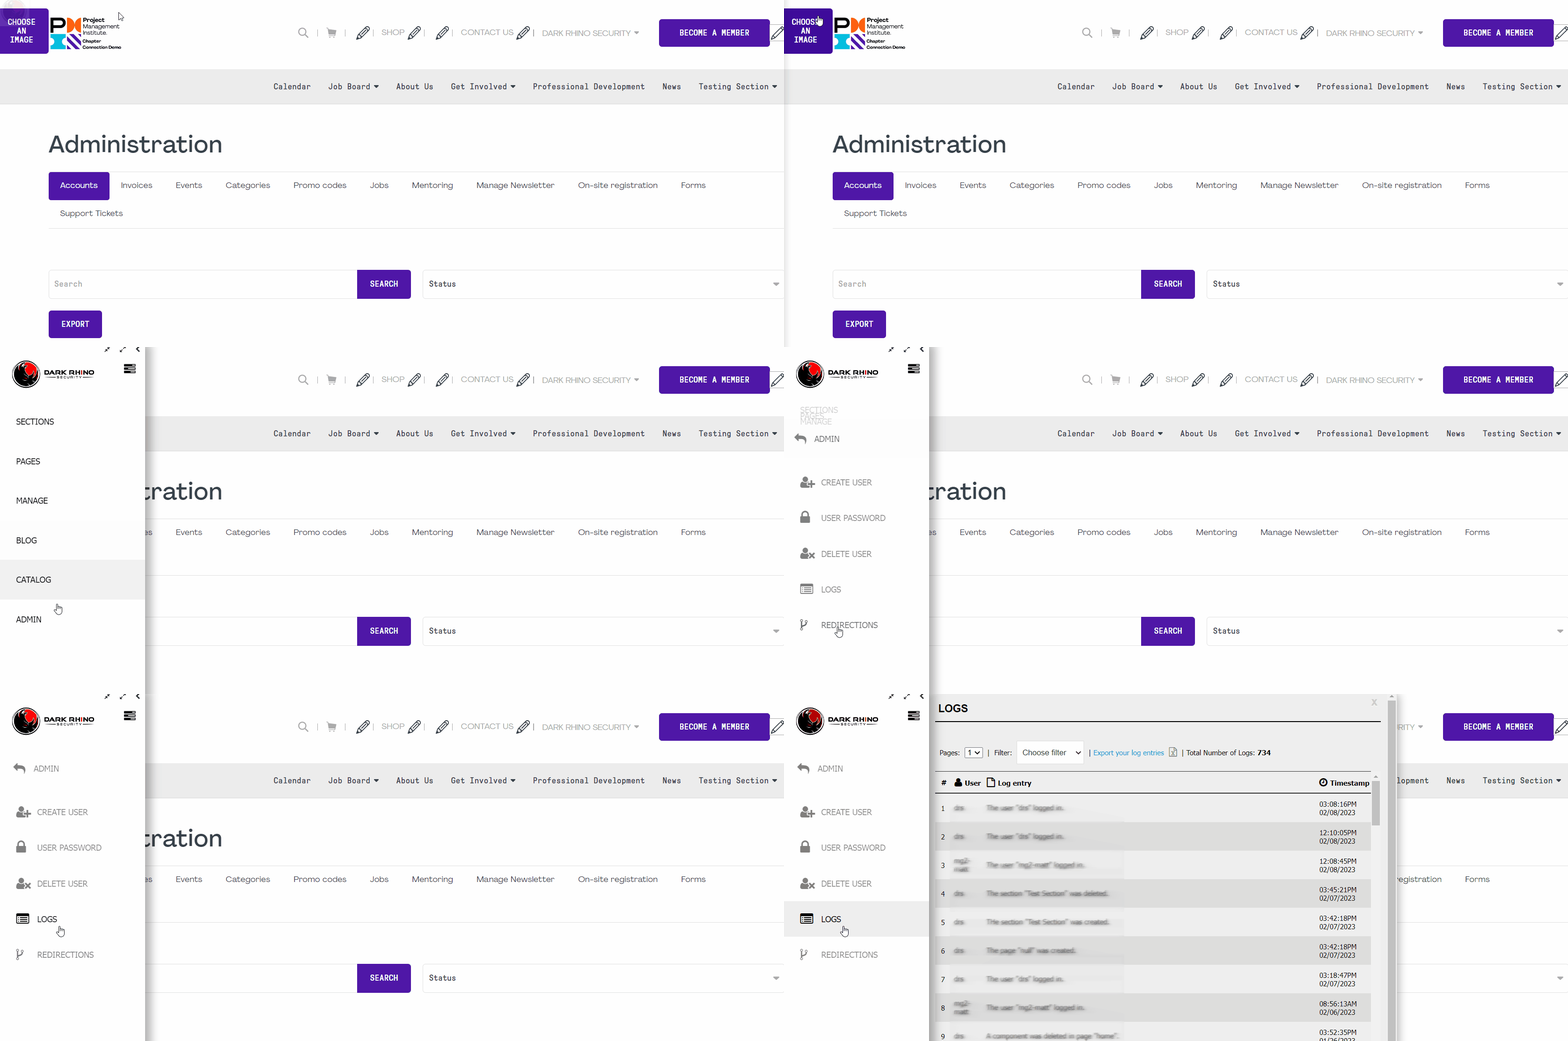
- To view the list of log entries for your website, click on the DRS logo and choose "Admin" from the menu.
- A drop-down menu will appear and click on "Logs".
- A page will appear with the full list of log entries.
- User: The user involved in the log entry.
- Log Entry: What hevent occured that triggered this log entry.
- Timestamp: The date and time of the log entry.
You can also:
- Filter: choose a filter to see the actions of a particular user.
- Click on "Export your list of entries" to export all your logs in an Excel format.
To create a redirection from one URL to another URL you can use this functionality by following these steps:
- Click on the DRS logo and choose "Admin" from the menu.
- A drop-down menu will appear and click on "Redirections".
- Enter the source URL on which you would like to set the redirection in the "Source URL" field.
- Enter the destination URL that you would like to redirect to in the "Targer URL" field.
- Set the type of redirection (301 is a permanent redirection, 302 is a temporary redirection an 404 will show a "page not found" error).
- Click on add.
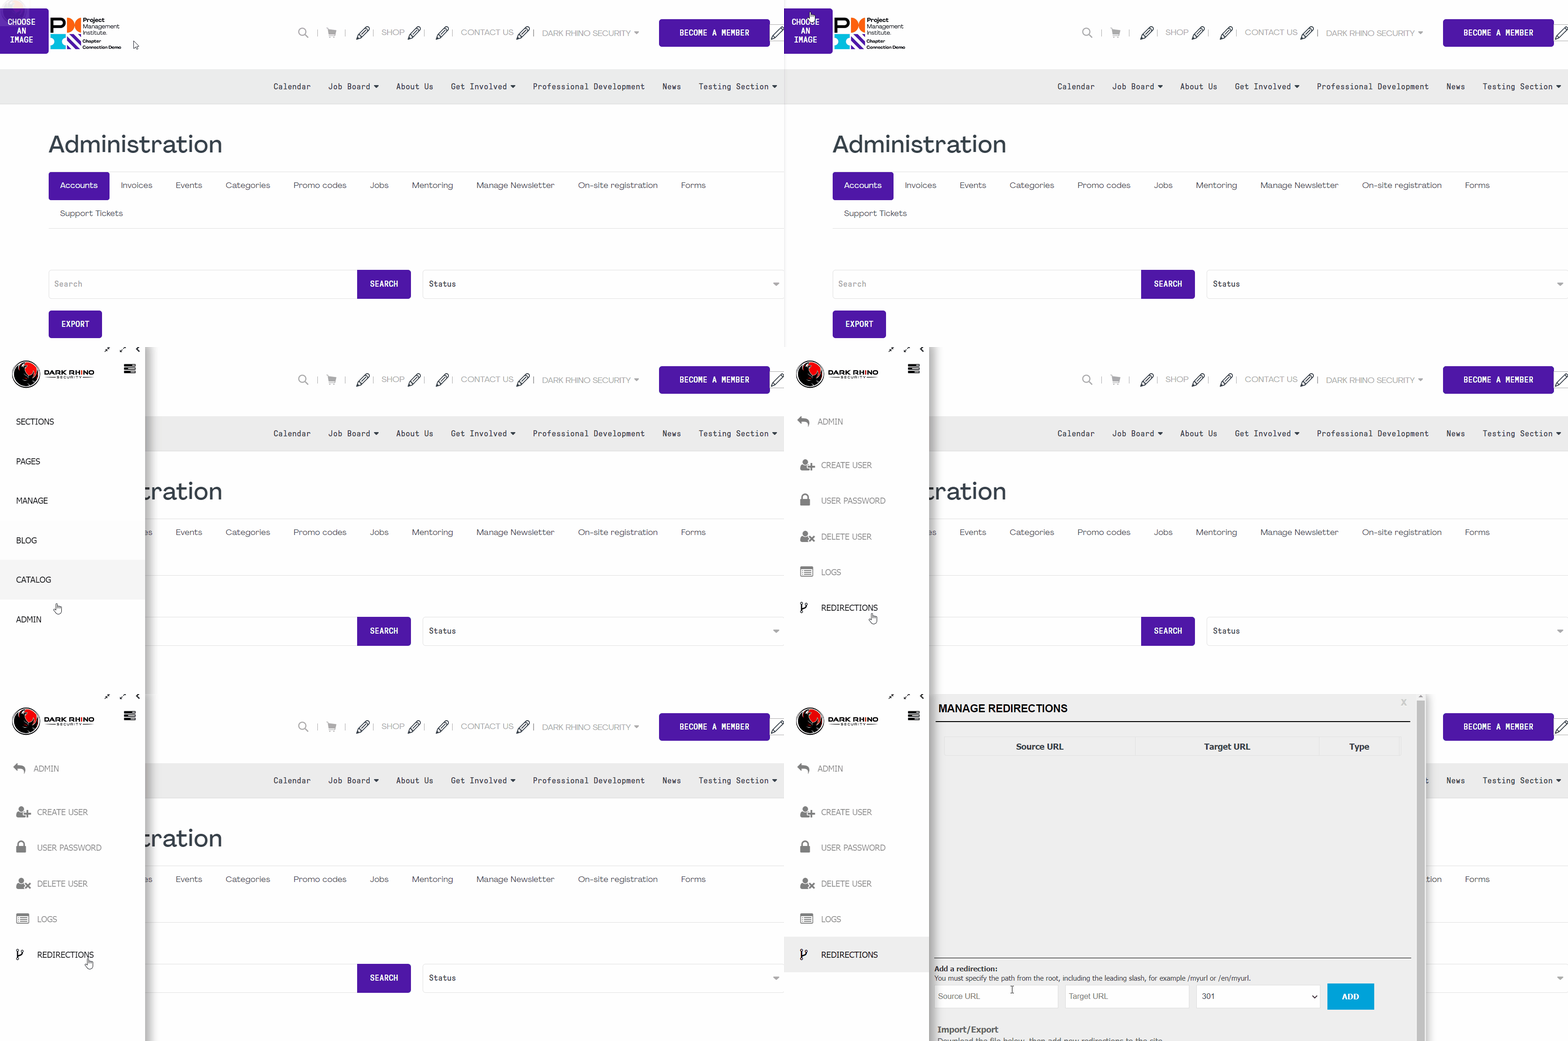
Note that the source URL should always begin with a slash, it is the full URL following the domain name. For example if we want to redirect https://www.pmichapter.com/some-page to https://www.pmichater.com/some-other-page, we would put "/some-page" in the source URL and "/some-other-page" in the target URL. If the target URL is on another website, you can put the full URL in this field only.
Note that if this feature is currently not available on your website, please open a ticket with us and request that "promoting members to administrative users" be enabled for your website. This is a free option that we will gladly active for you.
In order to promote a member account to be an available administrative user, please use the following steps:
- Go to the Accounts section from your website's administrative section.
- Locate the user that you would like to promote to an administrative user and click on
 to promote them.
 - At any point, if you wish to remove them from being an administrative user, click on
 .
.
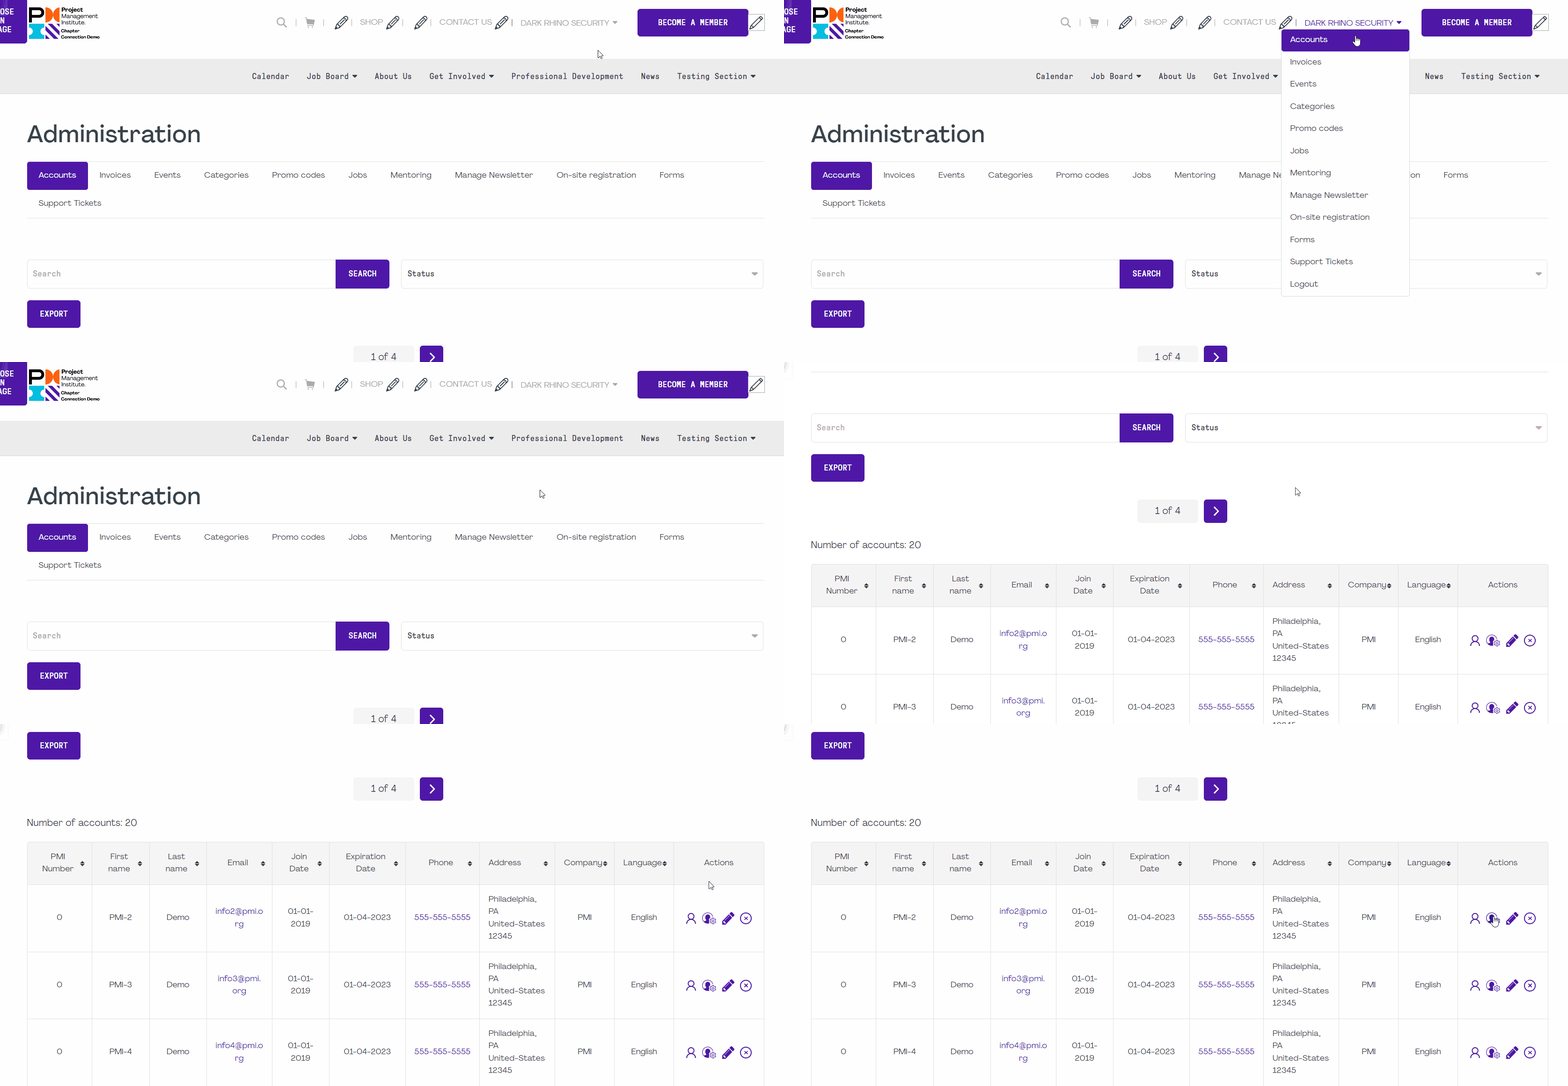
The member's email will appear in on the list of administrative users in the access rights page. To learn more about how to manage the access rights, you can watch this training video.


