Events Management
In this article
- Managing Events
- Creating an Event
- Event creation explained
- Adding a general description shared by all events
- Managing Participants
- Automated reminder emails and sending the list of participants automatically
- Coloring on the calendar
The events are at the of your chapter website. This section will show you how to add and manage your events and event participants. You can also view our training video on how to manage this portion of your website.
Calendar view modes
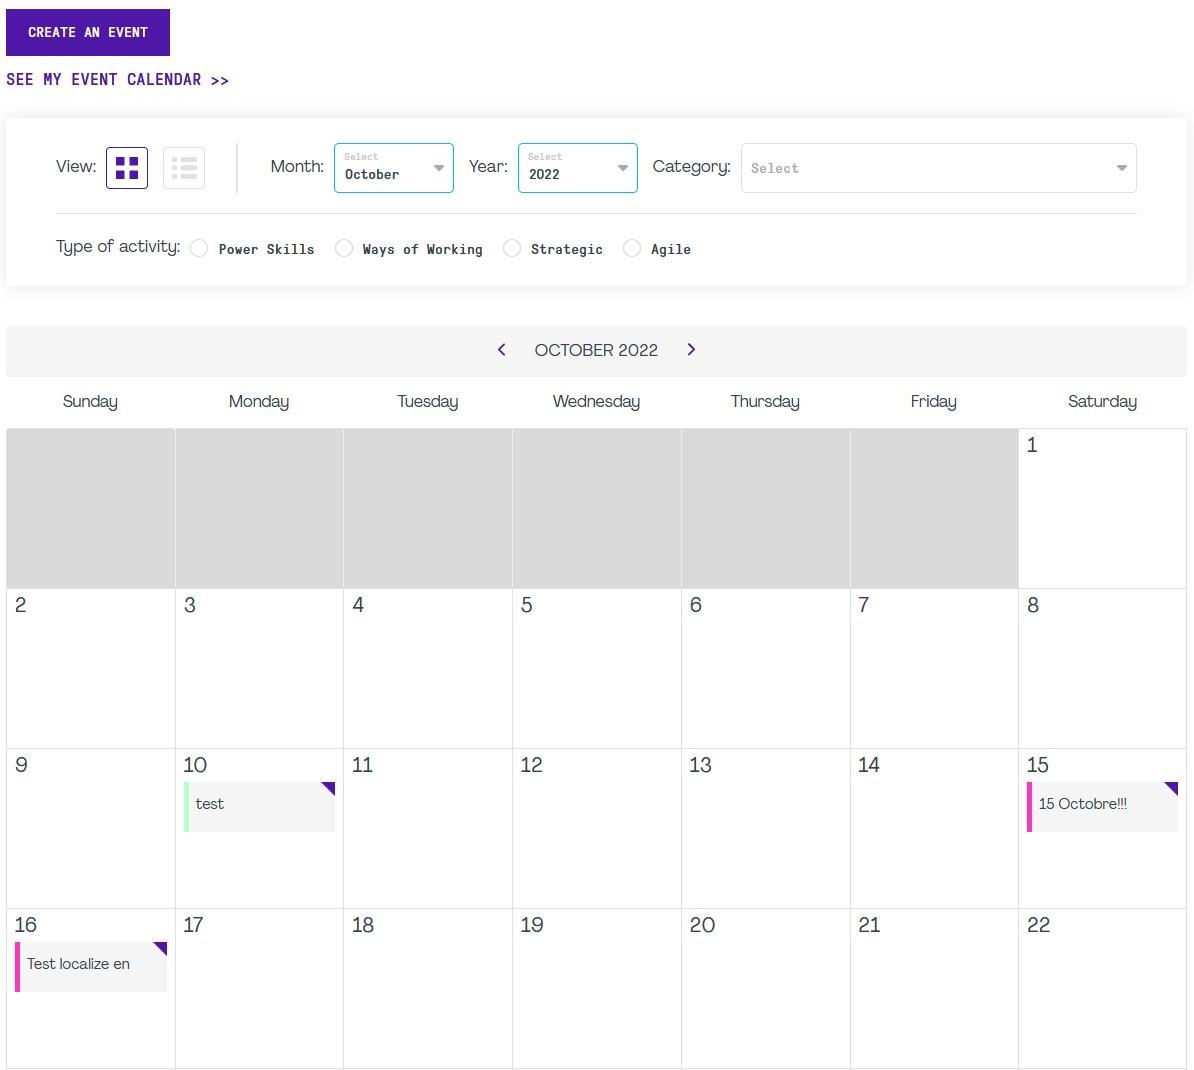
In the admin calendar, there are 2 views: Grid (default) and List.
- Grid view
- List view
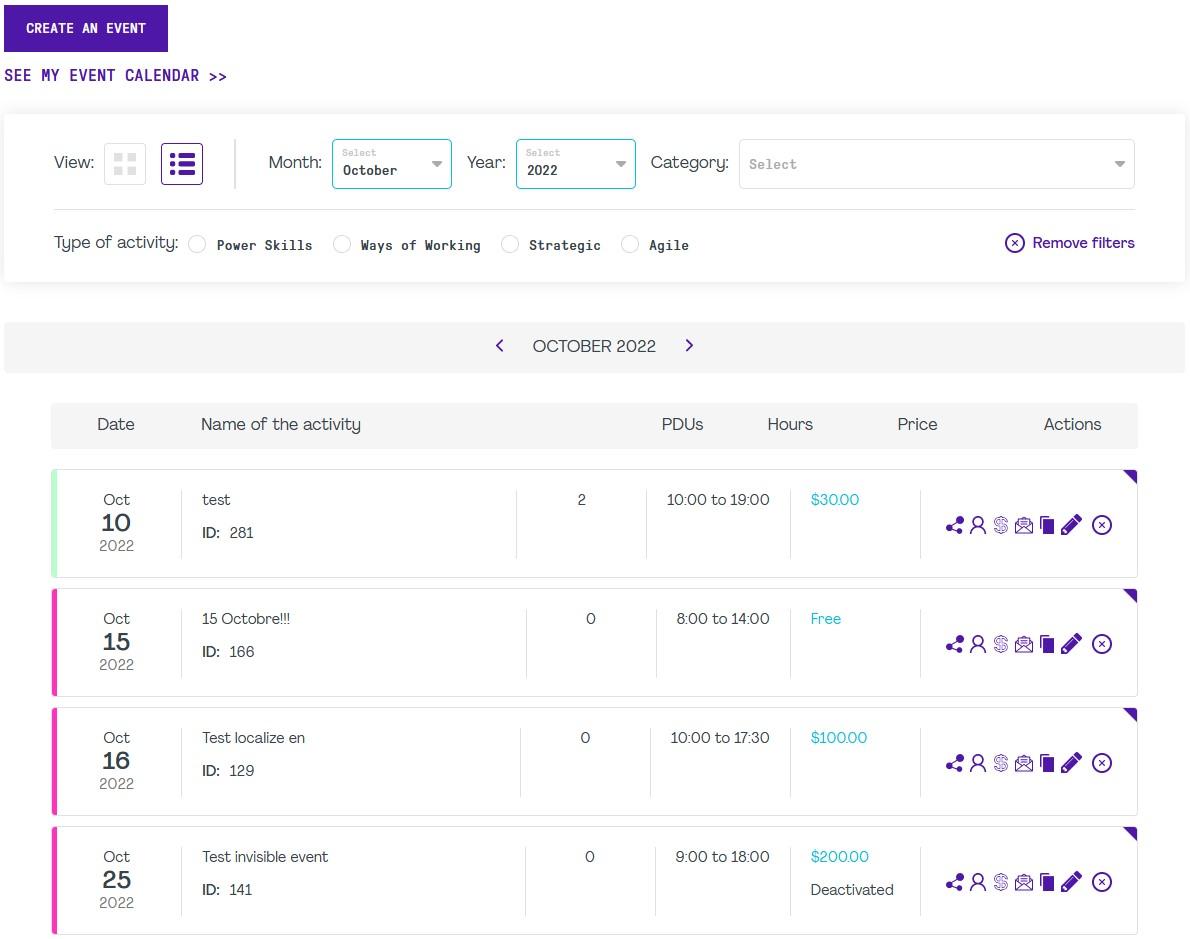
Actions
 Copy event link to share.
 Participants list, to manage attendance, export attendees list, and create QR badges document.
 required activation* Event expenses, for administrative and finance purposes.
 required activation* Mailing scheduler, to manage email automation which can send a list of participants to designated emails, or send a reminder to all participants of the event at a set time and date.
 Duplicate event.
 Edit event.
 Delete event.
*These features are not available by default, if you would like to use them, please open a ticket and we will activate them for you.
In this section, you can also create an event:
- Click on the "Create an event" button.
- Fill the required fields.
- Click on "Add".
Info Section
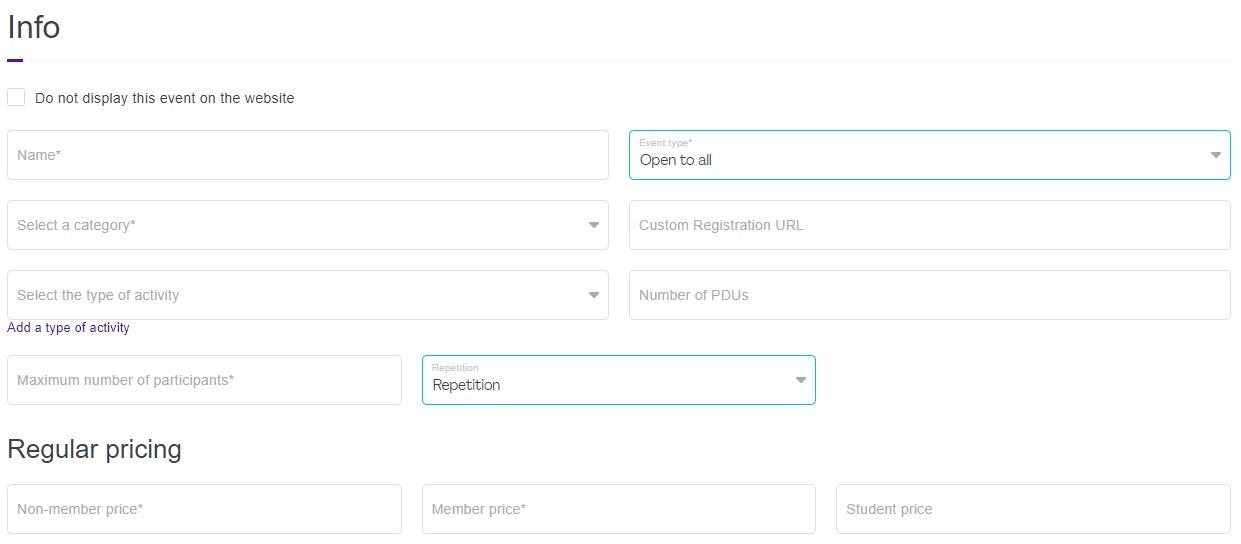
- Do not display this event on the website :
This allows you to hide this event from the public. It won't appear anywhere on the website.
BUT the page will still be reachable if you share the link. - Name :
This is the name that will appear to the public. If your website supports multiple languages, you will have a name field for every language. - Event Type :
- Open To all : No restriction to register to the event.
- Deactivate : This event is disabled everywhere. No one can access it anymore.
- Members only - Display to all : Everyone can see it, but only members can register to it.
- Members only - Display only to connected members : Only members can see it and register for it.
- Display Only (Everyone) - No registration allowed - Price hidden : It can be seen by everyone, the price is hidden and nobody can register for it.
- Display Only (Logged in Members) - No registration allowed - Price hidden : Only the members can view it. Registration is disabled and the price is hidden.
- Board Members Only: This will be displayed only to those who are in the board members group. To add someone to the board members group, go to the Accounts tab, find them, click on edit and then click on the Board Member checkbox.
- Volunteers only : This can be viewed and registered only by Volunteers.
- Volunteers and Board Members : This can be viewed and registered only by Volunteers and Board Members. - Category :
Select the category for your event. - Custom Registration URL :
External registration link to a third party event host (such as Event Brite). If the built-in payment system is being used, leave this field empty. - Number of PDUs :
This is the number of PDUs this event will give your members. You can also set the type of PDUs and you can add additionnal PDU types and numbers by clicking on "Add a type of activity". When an activity is selected, a triangle will show on the top right corner on the calendar for that event. The following colors apply for the traingle starting with the first type:
@pdu1: @aqua;
@pdu2: @violet;
@pdu3: @orange; - Maximum number of participants :
The maximum number of participants allowed for this event. Once this number is reached, the registration will be closed automatically. - Repetition:
Allows you to have this event span over multiple days or weeks in a specific repeating pattern. - Non-member, Member, Student price :
The price to pay for the various account types, the price will be automatically calculated based on the person's account.
Early Bird Pricing
(Requires activation)

Early bird pricing allows you to offer your users (members and non-members) a different price until a specific date.
Late Pricing
(Requires activation)

Late pricing allows you to set higher prices for your users (members and non-members) after a specific date.
Extra pricing
(Requires activation)

More price options can be managed in Extra pricing. When at least one price option is set, users will have the choice to select the regular option or this one at the event registration. For example, in person and virtual options.
The options currently only support regular price and member price.
Information about the location

This is the address for your event.
You can add an image to help your users find the place. This image will appear on the right hand side of the event details page, along with the address that you specified.
The location's URL allows you to add a link to any extra information that could help localize the event:
google map (or any other map), location's website, etc.
Date and time
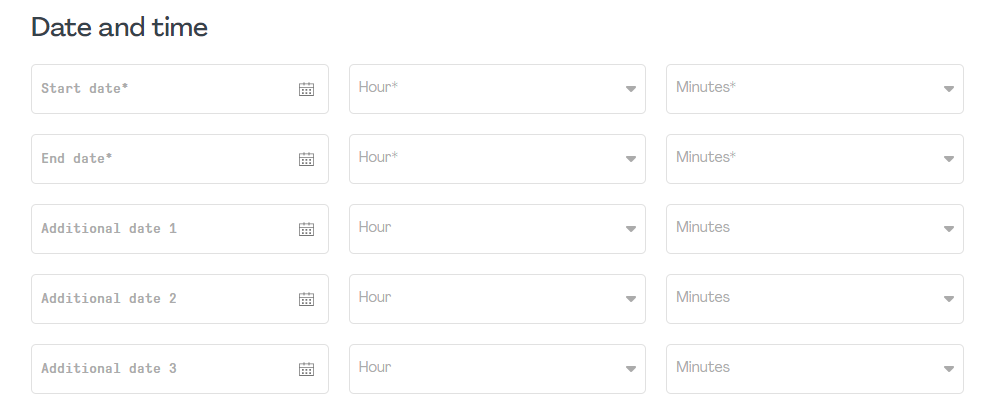
This is the date and time of your event.
The 2 first rows are required they are the start and end date of your event. Registration is no longer available beyond the start date.
Note that if you used a repetition of Every Sunday for example, all of the Sundays between the start and end date will have this event displayed on the calendar.
The 3 last rows allow you to specify any extra date for the event. They will be displayed in the calendar.
Extra Options
(Requires activation)
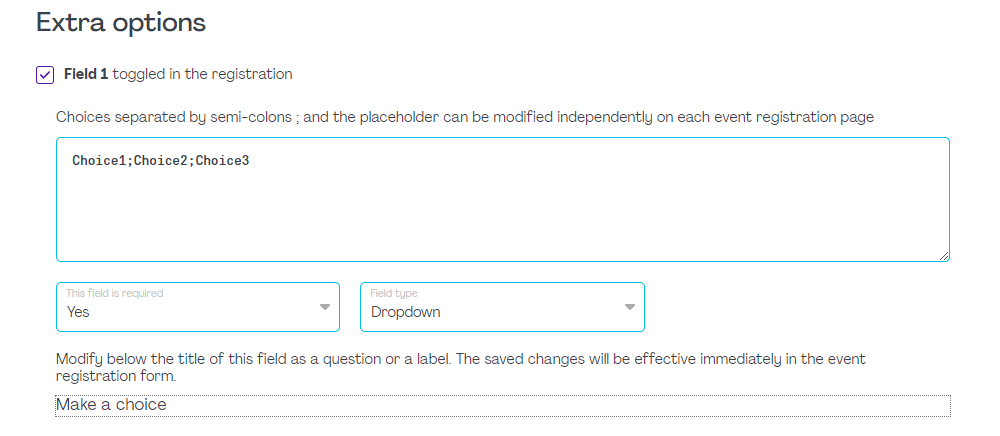
This section allows you to request extra information when a participant registers.
If you do not wish to add this extra option, do not check the checkbox.
Otherwise, check it, and fill the information:
- In the textarea, enter the list of items separated by semi-colons.
- Then specify if this field is required when the user registers.
- And finally specify how to display the selection (multiple checkboxes or a dropdown menu).
> The dropdown forces your user to select only one item:
> The multiple choice checkbox allows your user to select any number of items:
Descriptions
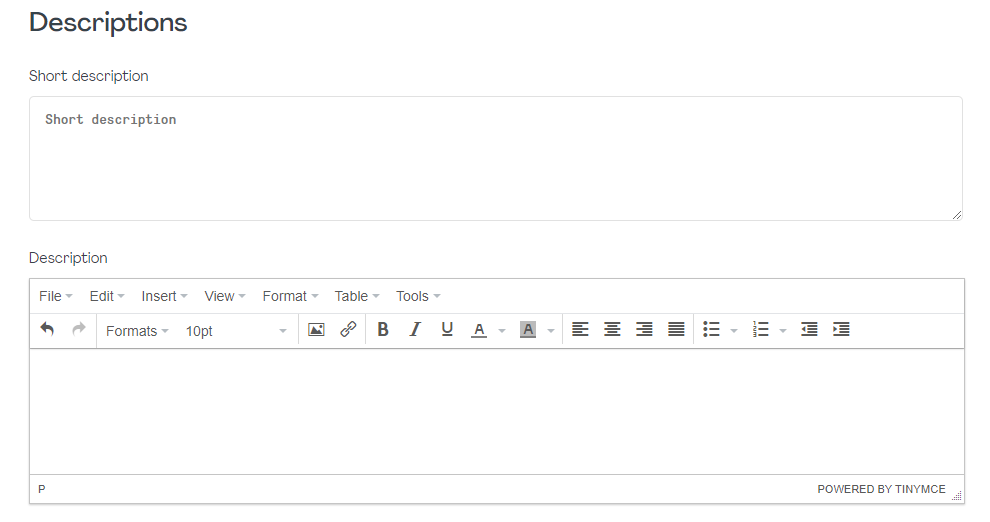
This is the description of your event.
If your website has multiple languages, you will have a description field for each language.
The short description is mostly used in the invoices to display a description of the event as well as anywhere that an event's snippet information is displayed (featured events component, popup, etc.).
The description will appear in the details page of the event.
Speakers
(Requires activation)
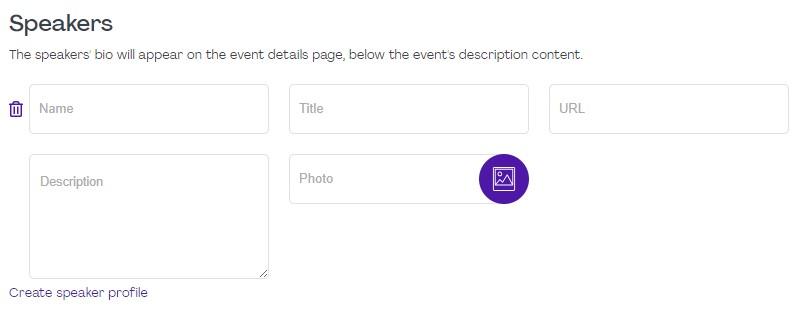
Allow managing a list of conference speakers in an event. The speaker profile musts have a valid name or URL to be saved. Title, Description, and Photo fields are optional.
Special info after payment
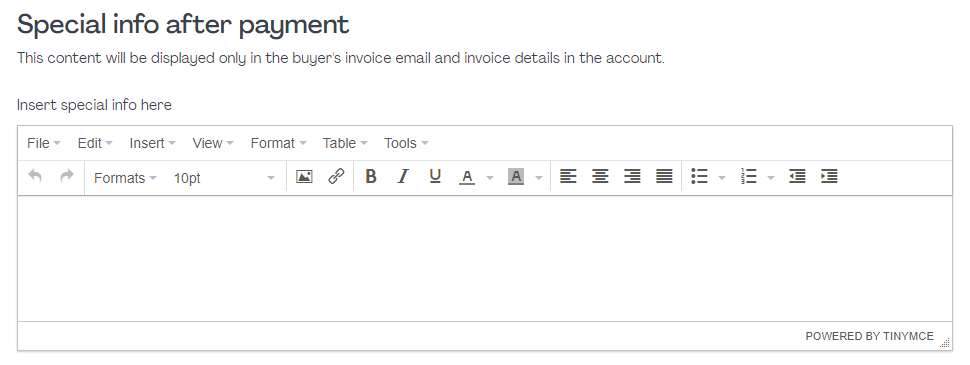
This text zone allows you to specify text that will not appear anywhere on the website, but will be added to the invoice email and invoice detail in the account when, AND ONLY WHEN, a user registers to the event.
This can be useful, for example, if your event has a meeting link and you want to communicate that link to those who have registered to the event.
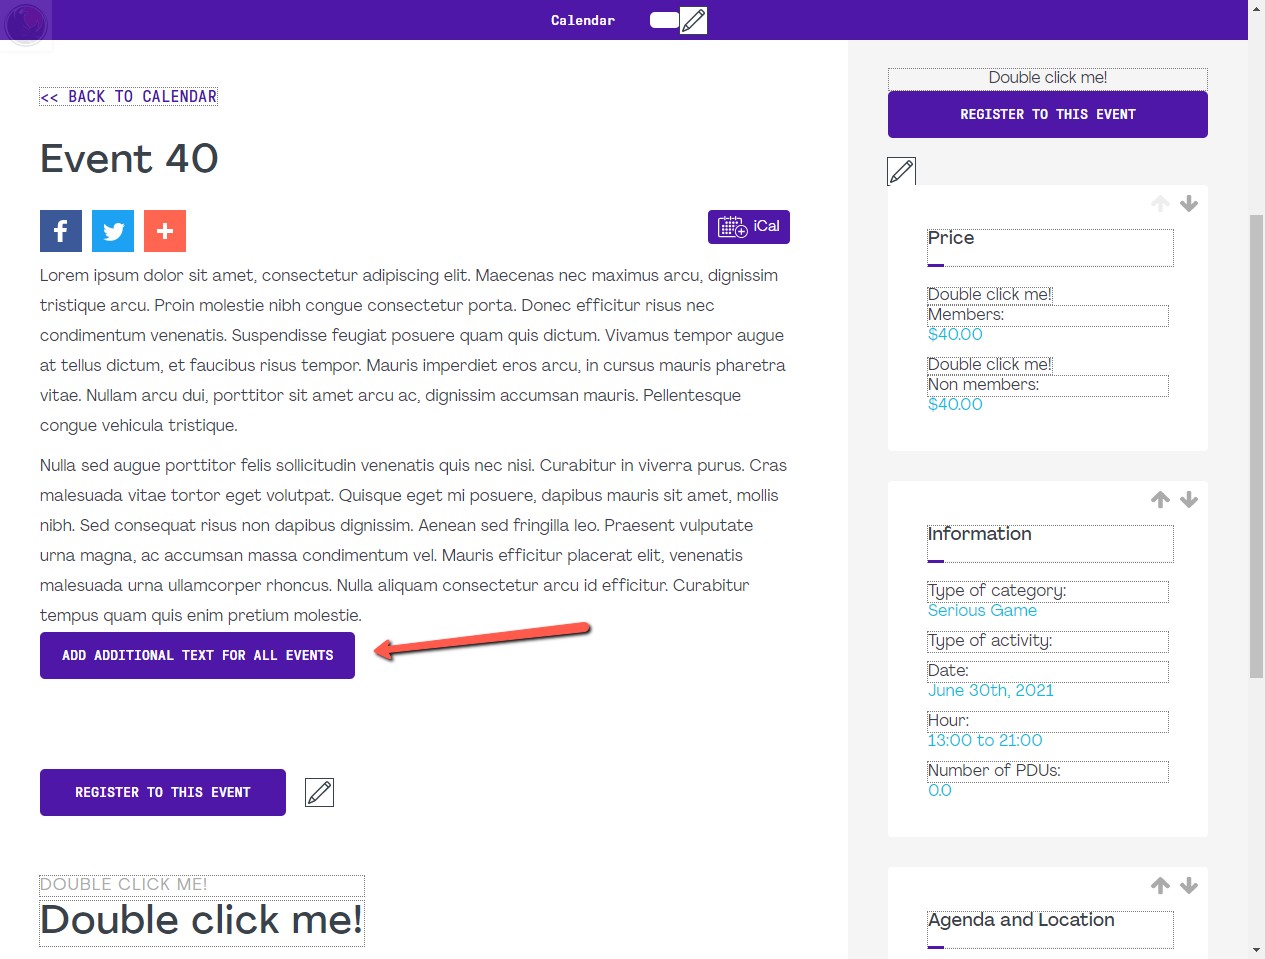
If you'd like to have content that is displayed in all of your events pages, you can use this feature. You only need to modify this content once and it will be applied to all event pages.
To do this :
- Go to any event details page.
- Under the event description, you will find a button "Add additional text for all events".
- Click on that button. This will open a popup in which you will be able to add content and save.
- DONE! This content is now available under the description of every event page.
When you modify an event, there is a tab at the top for the participants. In this screen, you will see all of the participants that have registered to your event.
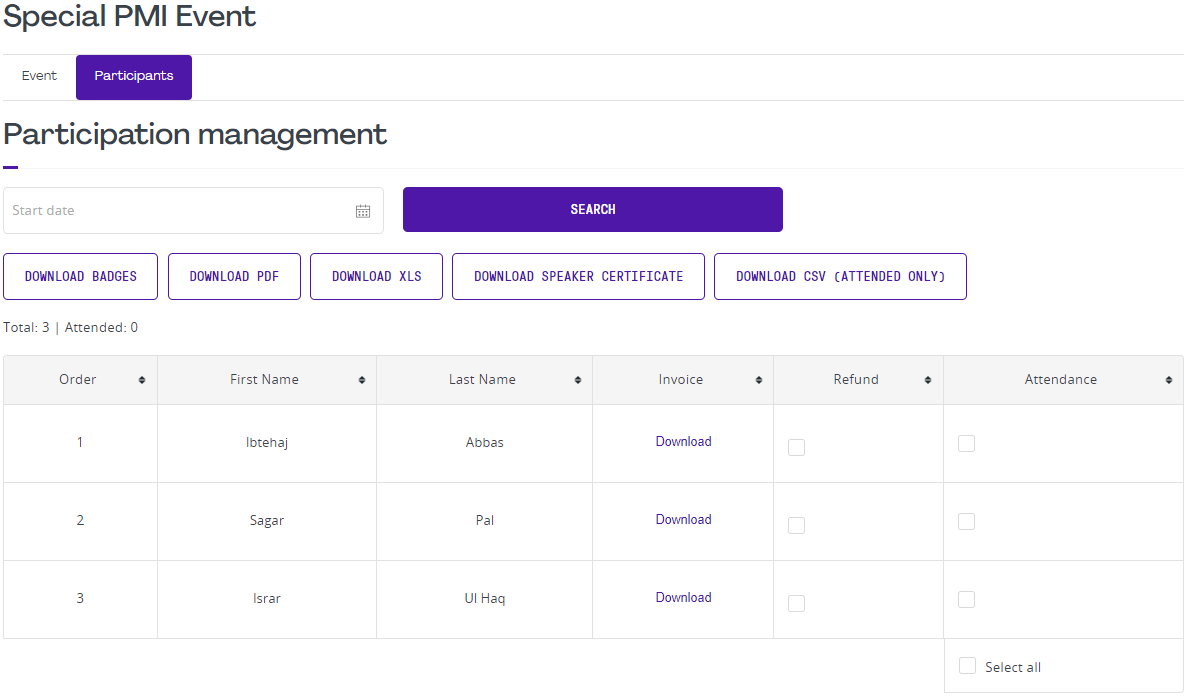
At the top, you will see 5 buttons:
- Download badges: This allows you to generate a PDF file in different Avery formats (for printing) of the badges for the people who are registered to this event. You can also scan those badges with your phone if you are logged in to the website and have the PMI Badge Scanner role.
- Download PDF: This PDF is a list of all of the registered people to this event.
- Download Excel: This is an Excel file which contains the list of all of the people registered to this event.
- Download Speaker Certificate: Clicking this button will generate a certificate for the speaker.
- Download CSV: This file is used to generate the CSV file required to credit people with their PDUs. This file will only export those who are marked as having participated to the event. You can log in to the chapter services platform on PMI Global's website to upload this file and automatically credit everyone with their PDUs.
There are two columns with checkboxes:
- Refunded: This is a checkbox for internal record keeping only, it does not refund this invoice, in order to refund, please click here to see the instructions on performing a refund.
- Participated: This is important to track who attended the event, it is used in the "Download CSV" above to credit PDUs and it is also used by the newsletter system if you want to send a message only to those who have attended an event.
You can setup an automated reminder for your event or have the list of all participants sent to one or multiple email addresses (this can be useful when working with external partners on an event).
In order to do this, you need to have this feature enabled, if it is not currently enabled on your website, please open a ticket with us and we will be happy to add it.
To reach this feature, go to your events calendar, then click on an event and click on this icon " "at the top left of the popup.
From there you can add multiple scheduled events by clicking on "Add a Schedule":
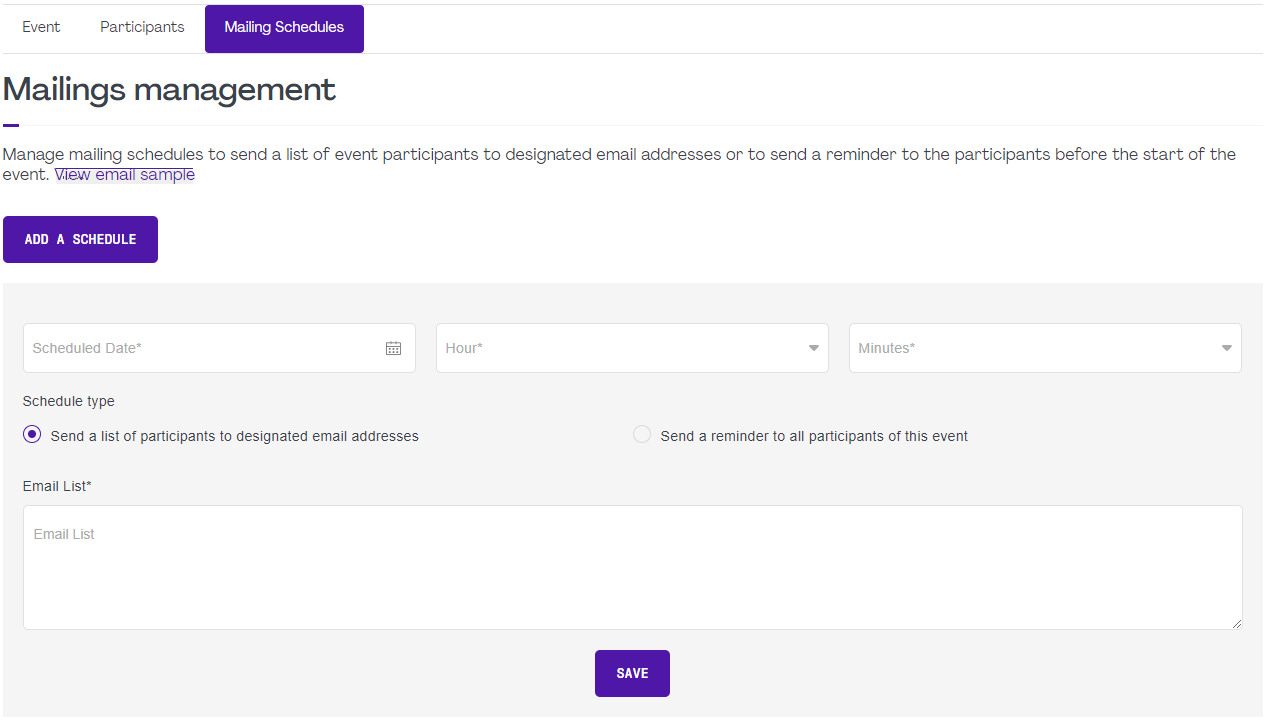
You can then select to either:
- Send a list of participants to designated email addresses: this will send the list of all participants to the email address(es) that you put in the list below on the specified date.
- Send a reminder to all participants of this event: this will send a reminder email to all the people who signed up for this event at the given time.
Please note that you can add multiple scheduled emails for a single event.
ways of working: @violet;
business acumen: @orange;


